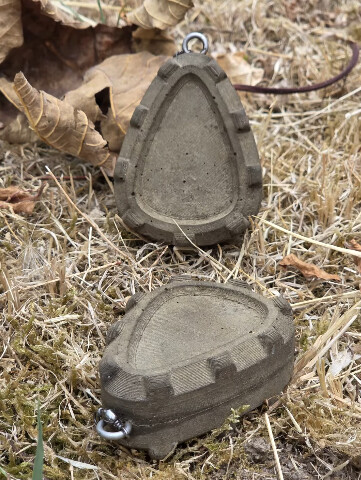
As more anglers look for environmentally friendly alternatives to traditional lead weights, cement-based fishing leads are becoming increasingly popular. While they don’t completely replace lead in every situation, they offer a cheap, easy-to-make option for many carp fishing applications, especially on waters where lead alternatives are encouraged or required.
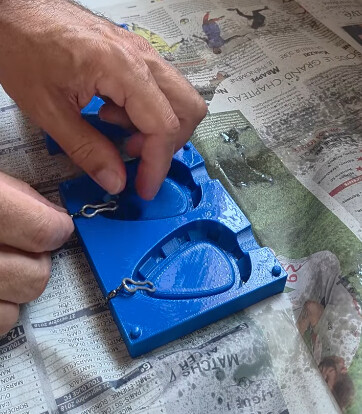
With the rise of affordable 3D printers, producing your own custom moulds has never been easier. Whether you want inline leads, distance shapes or simple dumpy weights, a 3D printed mould allows you to create consistent, reusable moulds at home for just a few pounds.
Why Use Cement Instead of Lead?
Traditional lead has been the standard for decades thanks to its high density and compact size. However, cement offers several advantages:
-
Environmentally friendlier than lead if lost in the lake.
-
Extremely inexpensive.
-
Easy to source from any DIY store.
-
Can be customised with colours and additives.
-
Perfect for snaggy venues where losing leads is common.
The downside is density. Cement is significantly lighter than lead, so a 3oz cement weight will be physically much larger than a 3oz lead. For most margin, bait boat and short-to-medium range fishing this isn’t usually an issue.
Designing the Mould
The beauty of 3D printing is that you can design virtually any shape you like.
Popular designs include:
-
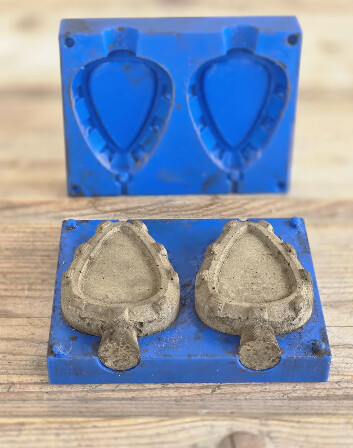
Flat Pear
-
Distance
-
Dumpy Pear
-
Inline
-
Square or cube weights for margin fishing
Most moulds are printed as two halves with alignment pins so they fit together perfectly. A channel is usually incorporated for the swivel or inline tube, depending on the style you’re making.
PLA is suitable for occasional use, but PETG or ABS tends to last longer if you’re making lots of weights.
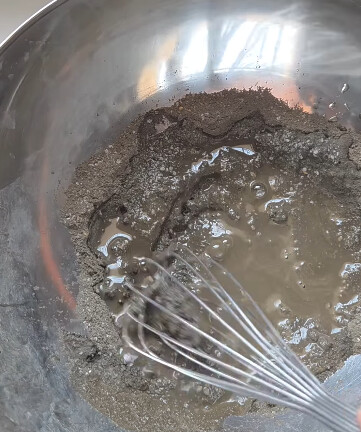
Choosing the Right Cement Mix
Not all cement is created equal.
A fine repair mortar or high-strength cement mix generally produces smoother, stronger weights than ordinary concrete, which often contains larger aggregate stones.
For even stronger weights, many anglers add:
-
Fine sand
-
Fibre reinforcement
-
Polymer bonding additive
-
Black cement dye
-
Brown oxide pigment
-
Green pigment for weedy lakes
Pigments can be mixed directly into the cement, meaning scratches won’t reveal bright grey concrete underneath.
Adding Weight
One limitation of plain cement is its relatively low density.
If you want smaller weights, you can experiment with adding heavier materials such as:
-
Iron powder
-
Steel shot
-
Fine gravel
-
Tungsten powder (expensive)
-
Recycled metal filings
These increase density while still reducing the amount of lead required—or eliminating it entirely if you choose.
Reinforcing the Weight
Although cement is surprisingly durable once cured, reinforcement helps prevent cracking.
Some useful methods include:
-
Fibreglass strands
-
Stainless steel mesh
-
Galvanised wire loops
-
Nylon fibres
For swivel leads, many anglers embed a stainless wire frame into the mould before pouring the mix.
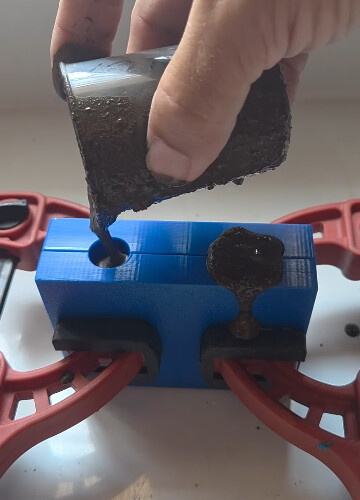
Pouring the Mould
Before filling the mould:
-
Spray the inside lightly with silicone mould release or cooking spray.
-
Assemble the mould securely with clamps or bolts.
-
Mix the cement until it has the consistency of thick yoghurt.
-
Tap the mould several times to remove trapped air bubbles.
-
Fill completely and level the top.
Allow the mould to sit undisturbed for 24 hours before carefully removing the weight.
Curing
Although the weight may feel hard after one day, cement continues gaining strength for several weeks.
For best results:
-
Remove from the mould after 24 hours.
-
Leave somewhere cool and dry.
-
Allow at least seven days before fishing.
-
Full strength is typically reached after around 28 days.
Patience makes a noticeable difference to durability.
Finishing Touches
Once cured, you can leave the weights natural or customise them further.
Popular finishes include:
-
Matt camouflage spray paint
-
Textured stone paint
-
Rubberised coating
-
Fine gravel rolled into wet paint
-
PVA-friendly sealers
Some anglers even press small stones or sand into the surface while the cement is still green to create a natural-looking finish.
Cost Comparison
Making your own weights can save a surprising amount of money.
Approximate costs:
| Item | Cost |
|---|---|
| 3D printed mould | £2–£5 in filament |
| Cement per weight | Under 10p |
| Swivel | Around 10–20p |
| Pigments | Pennies per weight |
Once you’ve printed the mould, you can produce dozens or even hundreds of weights for very little money.
Are They Worth It?
For many anglers, absolutely.
They won’t replace traditional lead for long-distance casting where compact size and maximum density are essential, but they’re excellent for:
-
Margin fishing
-
Short-range carp fishing
-
Bait boat work
-
Snag fishing
-
Waters encouraging lead alternatives
-
Anglers wanting to reduce costs
The ability to print your own moulds also means you’re not restricted to commercially available shapes. If you have access to CAD software or downloadable 3D models, you can create completely bespoke designs tailored to your own style of fishing.
CarpTalks Thoughts
Combining 3D printing with simple cement casting is an enjoyable project that produces practical, low-cost fishing weights while reducing reliance on traditional lead. With a little experimentation, you can fine-tune the mix, shape and finish to create durable weights that suit your fishing perfectly.
If you already own a 3D printer—or know someone who does—it’s a rewarding winter project that can leave you stocked up with enough homemade weights to last an entire season.